
Maximum Attack X is a new event that occurs in both Japan Phantasy Star Universe and Phantasy Star Portable 2. In cooperation with Phantasy Star Universe, players will accumulate points which can be used to increase the elemental attribute rate of four unique weapons. One weapon's elemental attribute is boosted each week based on the amount of points. You must talk to Bruce at the end of the mission to submit your points.
After the end of the Maximum Attack X Event, players will receive four "fun tickets" which can be used to exchange one of the weapons from each week.
To start Maximum Attack Cross Event missions, go to Internet Multimode > Extra Mission エクストラミッション > Clad6 クラッド6 > Maximum Attack Cross マキシマムアタッククロス
This post updates automatically

Maximum Attack Cross I is difficult for those under level 105. A combination of healers, attackers, and buffers will help you get through the difficult parts of the mission. Along the mission you will be collecting data chips. The amount of datachips you collect will determine your end result grade. Four data chips determines S grade.
- Relics Area: Near red NPC Kuno, use goggles to destroy rubble.
- Relics Area: In a Svaltus statue, use goggles to identify.
- Saguraki Block 1: Tree within the deadly Komazli コウマズリ spawns.
- Saguraki Block 2: Tree near the catapult jump.
Due to the cumulative effort of all players, an extra block has been unlocked featuring the rare pink rappy!

Maximum Attack Cross II is a mission taking place on an illusionary Parum. The mission starts out the same way as MAX I. There are modifications to make the enemy difficulty lower than before. The mission now has a scape doll that appears everytime in the last four boxes before you teleport to Parum.
The Parum portion splits the party in two and separates them by a red gate. After the spawn is defeated the party warps on top of a mound where chip #3 can be located. The party can damage other team mates by hitting several crate traps. In the next block, the party will fight more enemies and reach up to a gate. When opened several boulders will head into your direction.
- Relics Area: Near red NPC Kuno, use goggles to destroy rubble.
- Relics Area: In a Svaltus statue, use goggles to identify.
- Parum Block 1: Shows up after the warp. It's on the mound you stand on.
- Parum Block 2: Bushes near the corner, next to the 4 floor switches.

Maximum Attack Cross III takes place on Ryucross. The mission starts with a relics like area where you defeat plenty of Svaltus. The red areas on the map will shoot Zonde at you. After the spawn is complete you will head into a narrow hallway where you can meet various NPCs depending on what rank mission you are doing. During this time you should use the goggles on the pillars to get your data chips. The mission continues on Ryucross where your party is split in four, then split in two, then rejoin to overcome a floor trap area. The second block you fight more spawns and enter an area where you fight Vivienne. This area is highly deadly due to the number of fire gimmicks and how quickly Vivienne attacks you.
- In the narrow path filled with NPCs, use goggles on pillars
- In the narrow path filled with NPCs, use goggles on white flame
- Ryucross Block 1, within a pillar near the first key.
- Rycross Block 2 near last trap area, in an object towards your left hand side.
Maximum Attack Cross IV takes place in the final area of PSPo2. It even includes the final boss! This mission is special since it features a mini obstacle course, death traps that can kill the party if an enemy isn't defeated within a certain time, and traps that require all party members to stand in place together as they block deadly zonde. So it was extremely epic. There are a lot of NPCs in this mission especially towards the end where you'll see some familiar faces from Clad 6.
- In the narrow path filled with NPCs, use goggles on pillar
- In the narrow path filled with NPCs, use goggles on the white flame.
- Castle Block 1: Near the end of this block there is a large tree in the center.
- Castle Block 2: Off into a corner near the end of this block, inside some rubble.

The following are weapons and items needed for exchanging within the Maximum Attack X Clearing House マキシマムアタッククロス交換所.
This exchange mission is accessed via Story Mode > Exchange Missions 交換ミッション.
At the end of the Maximum Attack X mission you will receive one or two badges. For the first week you will only receive the "Special Badge" that can be traded for the items below. The second week for MAX II, you will receive the "Guardians Badge".
| Weapons | Requirements |
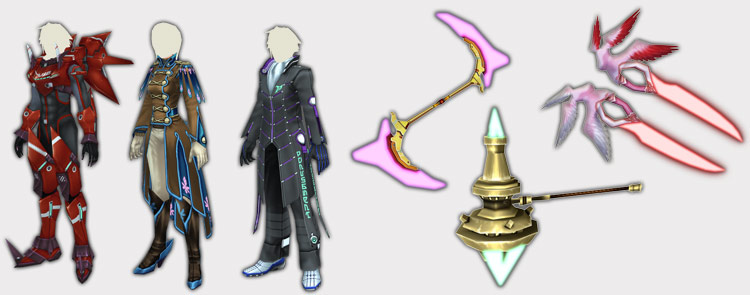
| Gaia Crusher ガイアクラッシュ |
Special Badge x 90 スペシャルバッヂ x 90 Guardians Badge x 90 ガーディアンズバッヂx 90 Guardians Badge x 90 ガーディアンズバッヂx 90 Little Wing Badge x 90 リトルウィングバッヂx 90 Little Wing Badge x 90 リトルウィングバッヂ x 90 Phantasy Star Badge x90 ファンタシースターバッヂ x90 Phantasy Star Badge x90 ファンタシースターバッヂ x90 |
| Yasminokov 9000 ヤスミノコフ9000 |
Special Badge x 90 スペシャルバッヂ x 90 Guardians Badge x 90 ガーディアンズバッヂx 90 Guardians Badge x 90 ガーディアンズバッヂx 90 Little Wing Badge x 90 リトルウィングバッヂx 90 Little Wing Badge x 90 リトルウィングバッヂ x 90 Phantasy Star Badge x90 ファンタシースターバッヂ x90 Phantasy Star Badge x90 ファンタシースターバッヂ x90 |
| Rutsularod ルツラロドウ |
Special Badge x 90 スペシャルバッヂ x 90 Guardians Badge x 90 ガーディアンズバッヂx 90 Guardians Badge x 90 ガーディアンズバッヂx 90 Little Wing Badge x 90 リトルウィングバッヂx 90 Little Wing Badge x 90 リトルウィングバッヂ x 90 Phantasy Star Badge x90 ファンタシースターバッヂ x90 Phantasy Star Badge x90 ファンタシースターバッヂ x90 |
| Dagger Of Sarafi ダガーオブセラフィ |
Guardians Badge x 90 ガーディアンズバッヂx 90 |
| Kronos Keis クロノスケィス |
Phantasy Star Badge x90 ファンタシースターバッヂ x90 |
For Every Badge
Black represents no Element
Blue represents the Ice Element.
Red represents the Fire Element.
Orange represents the Ground Element
Yellow represents the Lightning Element
Grey represents the Light Element
Purple represents the Dark Element
One Photon Code フォトンコード1 is required is required for each. Photon Codes are randomly awarded in this mission.
| Room Goods |
Requirements |
| Kakwane Figure カクワネ・オブジェ |
Special Badge x 6 スペシャルバッヂ×6 |
| Jaggo ジャッゴ |
Special Badge x 6 スペシャルバッヂ x 6 |
| Booma Figure ブーマ・オブジェ |
Special Badge x 6 スペシャルバッヂ x 6 |
| Relaxing Jaggo リラックス・ジャッゴ |
Special Badge x 6 スペシャルバッヂ×6 |
| Rappy Gugg Figure ラッピーグッグ・オブジェ |
Special Badge x 6 スペシャルバッヂ×6 |
| Komazli Print コウマズリ魚拓 |
Special Badge x 8 スペシャルバッヂ×8 |
| PPT Shuttle PPTシャトルE機関用 |
Special Badge x 10 スペシャルバッヂ×10 |
| Rappy Scenery ラッピーのいる風景 |
Guardians Badgex6 ガーディアンズバッヂ×6 |
| Rappy Fossil ラッピーの化石 |
Guardians Badgex6 ガーディアンズバッヂ×6 |
| Parum Fountain パルムの泉 |
Guardians Badgex6 ガーディアンズバッヂ×6 |
| Parum Comm. Medal パルム統一記念メダル |
Guardians Badgex6 ガーディアンズバッヂ×6 |
| Vanda ヴァンダ |
Guardians Badgex8 ガーディアンズバッヂ×8 |
| De Ragan ディ・ラガン |
Guardians Badgex8 ガーディアンズバッヂ×8 |
| Lou Portrait ルウ・ポートレート |
Guardians Badgex10 ガーディアンズバッヂ×10 |
| Magashi Portrait マガシ・ポートレート |
Little Wing Badge x 10 リトルウィングバッヂ×10 |
| Magashi Portrait マガシ・ポートレート |
Little Wing Badge x 10 リトルウィングバッヂ×10 |
| Walking Pannon ウォーキング・パノン |
Little Wing Badge x 6 リトルウィングバッヂ×6 |
| Pogostick Bel-Pannon ホッピング・ベル・パノン |
Little Wing Badge x 6 リトルウィングバッヂ×6 |
| Gnome ノームドール |
Little Wing Badge x 6 リトルウィングバッヂ×6 |
| Presidential Chair プレジデントチェア |
Little Wing Badge x 6 リトルウィングバッヂ×6 |
| Ethan Portrait 2 イーサンポートレート2 |
Little Wing Badge x 10 リトルウィングバッヂ×10 |
| Moatoob Fest. Statue モトゥブ始原祭の像 |
Phantasy Star Badge x 6 ファンタシースターバッヂ×6 |
| Lapucha Scenery ラプチャのいる風景 |
Phantasy Star Badge x 6 ファンタシースターバッヂ×6 |
| Paura Figure パウラ・オブジェ |
Phantasy Star Badge x 6 ファンタシースターバッヂ×6 |
| Zuna ズーナ |
Phantasy Star Badge x 6 ファンタシースターバッヂ×6 |
| Tar Tarre タル・タルー |
Phantasy Star Badge x 6 ファンタシースターバッヂ×6 |
| Grina Beat S グリナビートS |
Phantasy Star Badge x 8 ファンタシースターバッヂ×8 |
| Music Disc 21 | Phantasy Star Badge x 3 ファンタシースターバッヂ×3 |
| Music Disc 22 | Phantasy Star Badge x 3 ファンタシースターバッヂ×3 |
| Clothes |
Requirement x Colors |
| Ethan Coat Repca イーサンコート・レプカ |
紫×黒: Purple x Black [S. Badge x 10 P.Booster x 3] —- 暗い緑×灰: Dark Green x Grey [S. Badge x 10 P.Booster x 3] —- 暗い黄色×黒: Drk Yellow x Black [S. Badge x 10 P.Booster x 3] —- 暗い青×暗い赤: Drk Blue x Drk Red [G. Badge x 10 P. Booster x 3] —- 暗い青×暗い青: Drk. Blue x Drk. Blue [G. Badge x 10 P. Booster x 3] — 赤×赤: Red x Red [Ltl Badge x 10 P. Booster x 3] — 黄色×灰色: Yellow x Grey [Ltl. Badge x 10 P. Booster x 3] — 明るい青×灰: Br. Green x Grey [Ltl Badge x 10 P. Booster x 3] — 黒×黒: Black x Black [PStar Badge x 10 P. Booster x 3] — 白×白: White x White [Pstar Badge x 10 P. Booster x 3] |
| ネオマガシ・レプカ Neo Magashi Repca |
[S Badge x 40 P. Booster x 3] — or — [G. Badge x 40 P. Booster x 3] — or — [Ltl Badge x 40 P. Booster x 3] —or– [Pstar Badge x 40 P. Booster x 3] |
| Laia Repca ライア・レプカ |
白×紫: White x Purple [S. Badge x 10 P.Booster x 3] —- 黄×緑: Yellow x Green [S. Badge x 10 P.Booster x 3] —- 黒×暗い赤:Black x Dark Red [S. Badge x 10 P.Booster x 3] —- 白×黒: White x Black [G. Badge x 10 P. Booster x 3] —- 白×暗い青: White x Navy [G. Badge x 10 P. Booster x 3] — 白×明るい青: White x Br. Blue [Ltl. Badge x 10 P. Booster x 3] — 白×黄色 White x Yellow [Ltl. Badge x 10 P. Booster x 3] — 黒×白 Black x White [Ltl. Badge x 10 P. Booster x 3] — 黒×緑:Black x Green [PStar Badge x 10 P. Booster x 3] — 暗い赤×黒: Drk. Red x Black [Pstar Badge x 10 P. Booster x 3] |
| Guardians Formal ガーディアンズ儀礼服 |
黄×紫: Yellow x Purple [S. Badge x 10 P. Booster x 3] —- 明るい赤×黄: Br. Red x Yellow [S. Badge x 10 P. Booster x 3] —- 明るい青×明るい赤:Br. Blue x Br. Red [S. Badge x 10 P. Booster x 3] —- 青×黄色: Blue x Yellow [G. Badge x 10 P. Booster x 3] —- 暗い緑×明るい赤:Drk. Green x Br. Red [G. Badge x 10 P. Booster x 3] — 暗い赤×青: Brown x Blue [Ltl. Badge x 10 P. Booster x 3] — 暗い青×黄色: Dark Blue x Yellow [Ltl. Badge x 10 P. Booster x 3] — 灰色×黄色: Grey x Yellow [Ltl. Badge x 10 P. Booster x 3] — 赤×黒 Red x Black [PStar Badge x 10 P. Booster x 3] — 暗い赤×暗い緑: Drk. Red x Drk Green [Pstar Badge x 10 P. Booster x 3] |
**Each Piece of Clothing requires three Photon Boosters フォトンブースター3.
Photon Boosters are randomly awarded for S rank Evaluation.
[via maxitem]


